When making a quilt, a good cutting technique is essential for a successful piecing and perfect lining-up of blocks and seams. In this post, I will talk about how to cut WOF (width of fabric) strips and sub-cut them for time saving as well as which tools will help you getting the job done with 100% precision :)
Best tools for the job
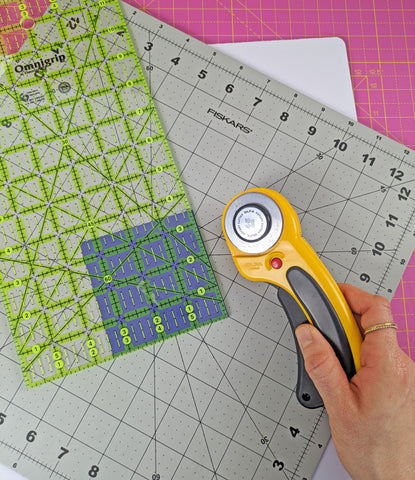
Rotary cutter and cutting mat
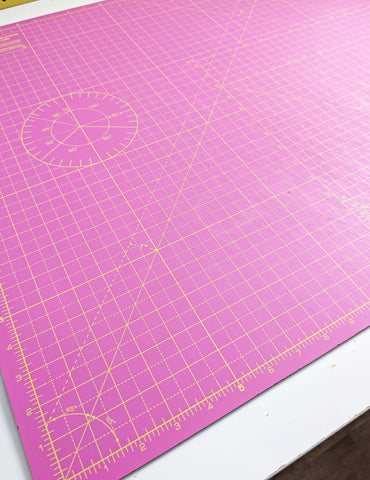
These are essential when cutting fabric for a quilt. You can achieve much more accurate results than with tailor or fabric scissors. You will also need a self-healing cutting mat. Mine has a side with imperial measurements and the other with metric (you can see both sides pictured below).
I also recommend pattern weights or a quilting ruler to keep the fabric in place while you cut (you can still use pins if you want, mainly if the quilt pattern you are using comes with templates that you need to print in paper).
Regarding the size of the blade for your rotary cutter, I have two different ones. The 28mm, which is great for cutting curves (right in the picture below) and the 45mm size, best for cutting bigger pieces and strips of fabric. They are both from Olfa.

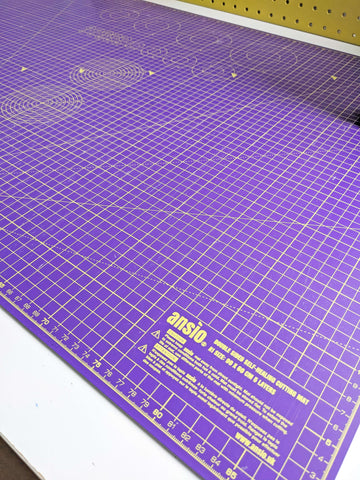
Regarding the cutting mats, I also wanted to mention the rotating cutting mat I got for trimming and squaring-up smallers blocks and units. This way I don't need to move the fabric but just rotate the cutting mat :) Clever, right?
Quilting ruler
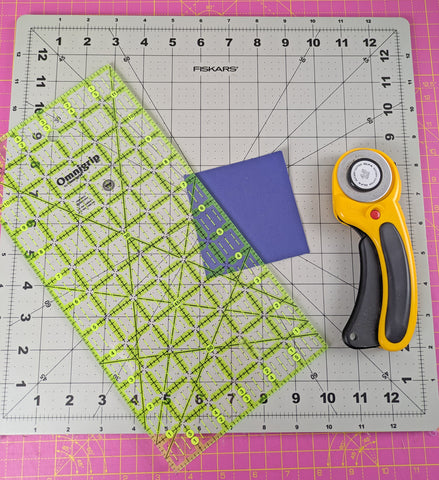
After much research, I found that the ruler that the non-slip Omnigrid measuring 6''x12'' (the smaller one in the picture below) was the best option for me. You will find lots of different sizes and brands and of course you can do your own research and find the one that works best for you. There is another Ominigrid size that I found very useful and it is the 6''x24''. It is longer and perfect for cutting WOF strips of fabric.
Apart from these two, I also got a set of square rulers that always come in handy for quilts that mainly use squares and to creat HSTs (half-square triangle blocks). These are not essential, but to have in mind for the future.

Cutting WOF strips of fabric
Time-saving cutting technique
When I first encountered a quilt pattern's cutting chart my brain basically could not handle it. Take for example the chart from my recently released quilt pattern, the Kaleidoscope Quilt.
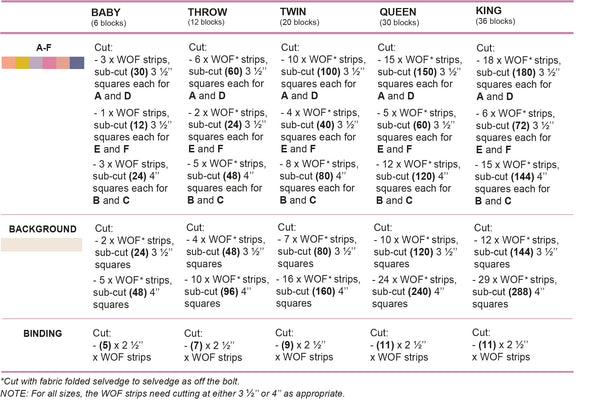
It is a lot, right? When you are a beginner, something like this can feel veeeery overwhelming but in reality it is basically a chart helping you to apply some time-saving techniques when cutting your fabric :)
Many quilts use squares to create blocks, like the Kaleidoscope Quilt or the Cutting Corners Quilt, and many, if talking about bigger sizes like Queen or King, might ask for as many (and more) as 200 squares for a specific colour like the background.
So, instead of cutting all those squares one by one or by just folding the fabric and using a template (like you might do when making a garment), you use the WOF strip cutting technique and then sub-cutting those strips into squares. Let's take a look at how it works.
1. Fold your fabric with the selvedges meeting at the bottom (or top) and the fold on the opposite side as shown below.
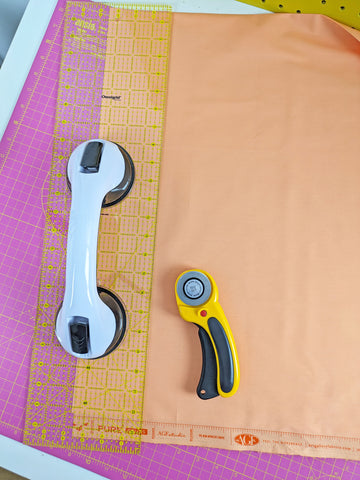
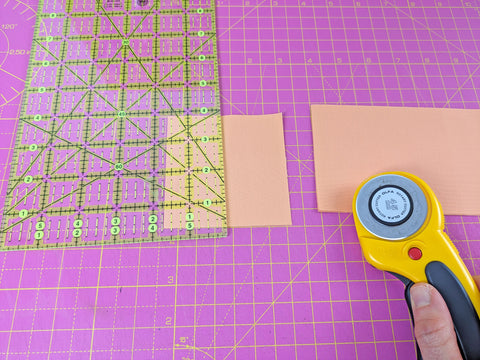
2. Pick up your rotary cutter and ruler (I am using the 45mm rotary and 6''x24'' ruler) and cut a strip using the WOF (width of fabric) as your length measurement and the width of your desired piece (in this case I was cutting 3 ½'' squares).
Hold your ruler tightly putting some pressure on it with your left hand and cut from bottom to top.

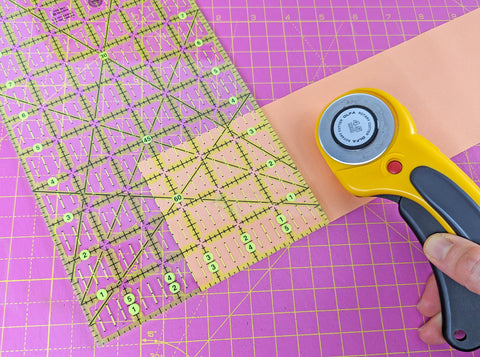
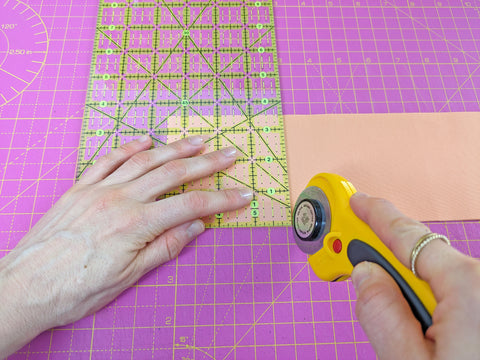
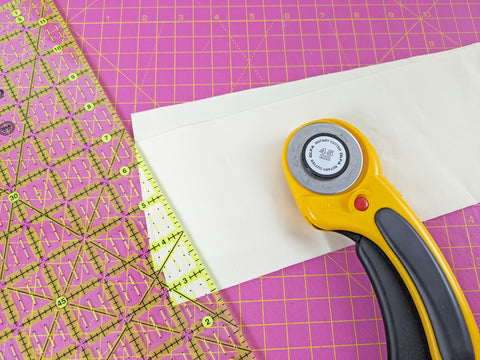
3. Now, I pick-up my smaller ruler, turn the folded strip of fabric horizontally and start sub-cutting it into 3 ½'' squares. Every time I cut I get two squares.
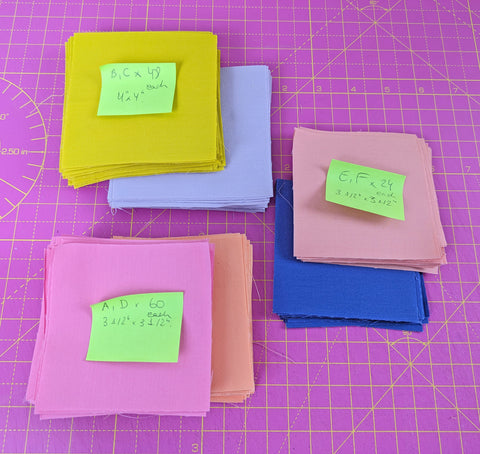
You can see here all the cut squares for the Kaleidoscope Quilt. A little tip when cutting for a quilt design with many pieces is to write on a post-it note or a piece of paper the measurement, colour and how many pieces you have cut.
Another tip is to place several strips of fabric to cut as many squares as possible in just one cut. This will depend on how sharp your blade is. Usually, I get away with cutting 6 single strips at the same time; I have tried with 8, but the cut was not as precise :)
Below, you can see how I placed two folded strips which gave me 4 squares as a result.
Now, if you go back to the cutting chart I added above, you might start to understand a bit better what all that means.
For example, where it says: "Cut 3 x WOF strips, sub-cut (30) 3 ½'' squares each for A and D", it means that you need to cut 3 strips of folded fabric with a width of 3 ½'' and a length that equals the width of the fabric.
Then, you need to sub-cut all those 3 strips into 3 ½'' squares to obtain 30 3 ½'' squares. And you need to do this for both colours A and D. In the you get 30 3 ½'' squares for colour A and 3 ½'' squares for colour D.
If you are feeling tired and thinking, ok Ana, let's us breath for a bit, I totally get you! It can feel overwhelming, but if you have understood more or less everything so far, you will have no trouble when trying a new quilt pattern :)
I hope you found this post interesting and remember that there is a brand new quilt pattern perfect for you to practice everything that you have learned here.
Happy quilting!
Ana
xxx