To achieve a perfect finished block where all points match, you need to learn the nesting seams technique and use a few tools that will help you during the process :) The Kaleidoscope Quilt pattern is the perfect design to (endlessly, sorry!) practice this and I will use it as an example at some point in this post. Let's start!
Perfect matching points
How to achieve nested seams
The term nesting seams means aligning the seams of each row so that they not only line up nicely but seem to almost fit together perfectly like a puzzle piece. This is done through a combination of pressing, pinning, and stitching (and pressing again one last time, hehe).
1. Pressing
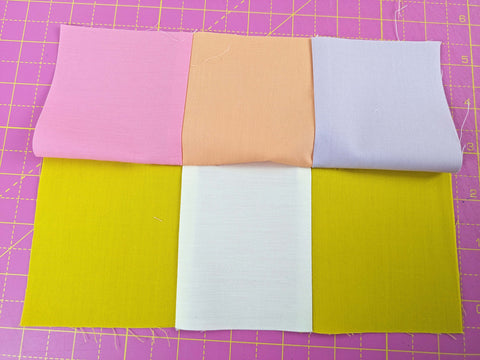
This is the most important part of the whole process and it consists on changing the direction towards where the seam is pressed on each row. So for example, if you have a 9-patch block, you need to press the seam on your first row in opposite directions away from the centre block.
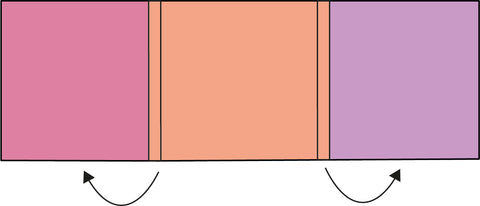
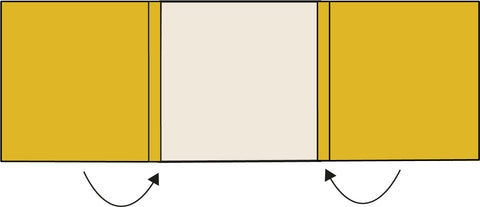
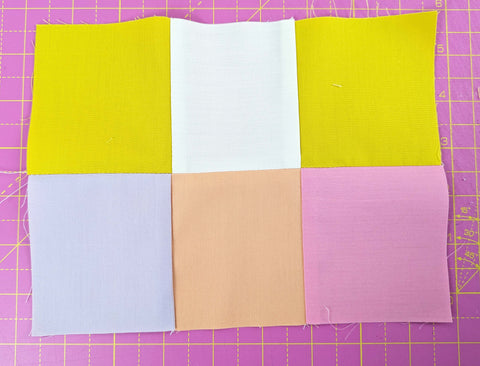
On your second row, the seams are pressed towards the centre block.
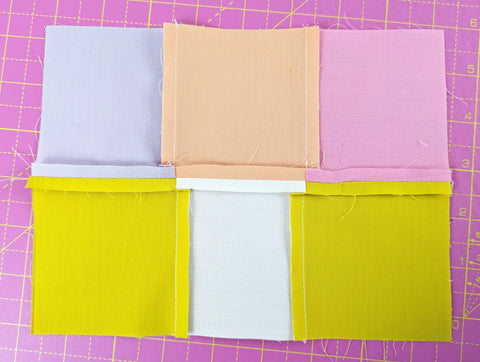
And on the third and last row of your 9-patch block, they are pressed again in opposite directions away from the same centre block.
This way, when we pin them together, they weight of the seams will be distributed equally and the seams and points that need to line up will do it easily.
Now, I would like to add something about pressing your seams together, like in the explanation above, vs pressing your seams open. You can also achieve a perfectly nested seams by pressing both seams open, also distributing the weight this way and actually achieving, many times, a flatter seam.
Open seams are strongly recomended when you have a block where lots of seams come together and you want to avoid a very bulky centre point, which is the case of the Kaleidoscope Quilt pattern and other of my quilt patterns. The main con is that you may end up with a tiny hole here and there where the seams encounter each other. For this not to happen, it is a good idea using a smaller stitch length, between 1.5 and 2.
Pressing seams open or together (usually towards the darker fabric) is still a matter of heated discussion among quilters. I usually choose depending on the project I am working on and which way would suit the block or design better :) Just trust your own instinct and practice both.
2. Pinning
The second most important part after pressing is properly pinning your seams with right sides together. What I always do is to pin just where the seams / points need to come together.
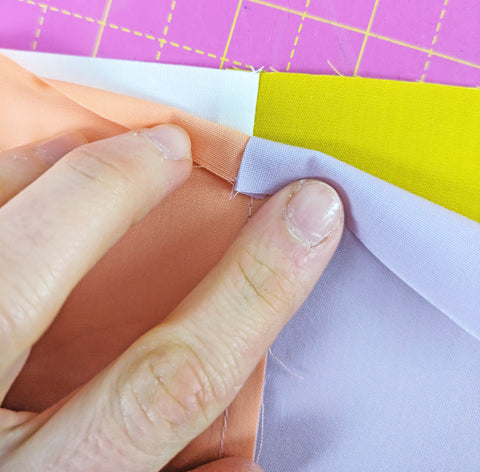
When pinning, I try to match as perfectly as possible the centre of both seams. If I am doing open seams, it is quite easy to spot if you are doing it right, although you are at a risk of opening that seam too much at the top when check. Regarding the pins, I try to place one just before the seam and then one right after as shown below.
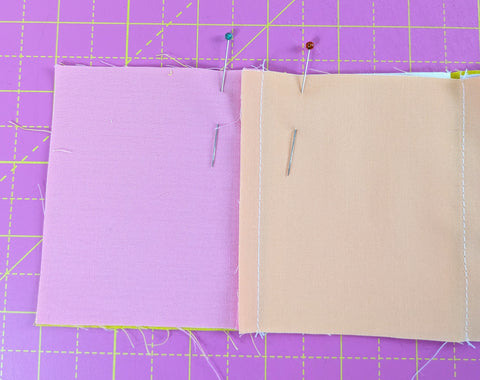
On the contrary, if I go for seams pressed to one side, I find again the centre, match it between seams and then place a pin on one seam side, on the actual seam, and another on the other side of the seam, to keep everything in place. As well, if I feel extra confident, I might just place one pin across horizontally.
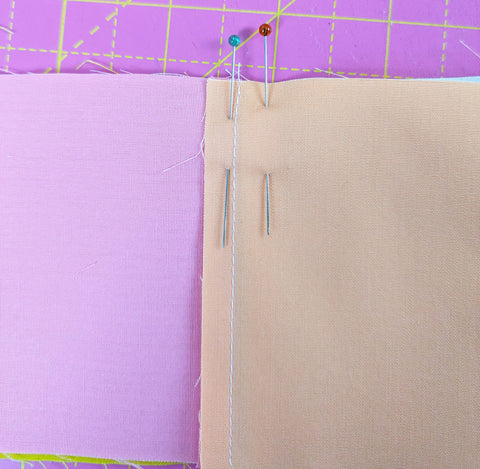
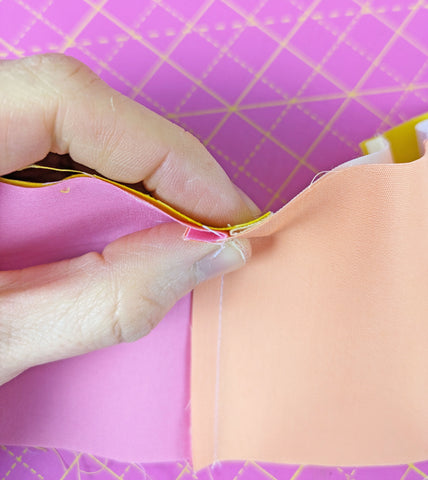
NOTE: Sometimes, with the seams together facing opposite sides, as the seam is just a bit bulkier, I have encountered problems with matching the points, as the fabric can move and misalign. To solve this, I lessen the pressure of the presser foot.
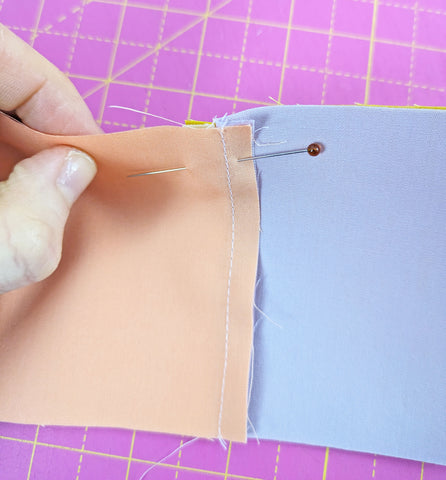
3. Stitching
When arriving at this point, instead of sewing the whole seam in one go, I just sew the part where the seams match and where I have placed pins in the previous step, starting right before the seam and finishing right after. Then I check on the right side how that matching point looks. If I am happy, I pin and sew the rest of the seam.
If I am not happy with how the seams match, I unpick and repeat the same process again. Although I have to admit that sometimes, after a few unpickings and stitchings, I just go for close enough!
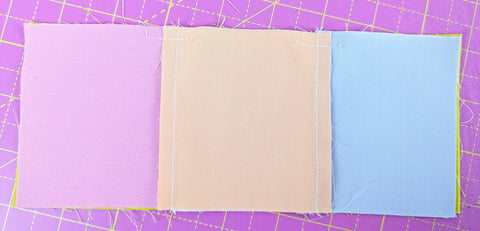
4. Pressing again
To finish, I give the whole block or unit a nice final press on both the wrong and the right side. My biggest pet peeve here is that not always, if you have a block with many seams, can make them behave properly! It really bothers me that when sometimes I press one seam, another one gets pressed the wrong way! To solve this, I try to use my small Prym iron or the tip of my big iron :)

And that is it for this post! I hope you found it interesting and that you will give a go at the nesting seam technique next time you make a quilt.
Thanks for reading!
Ana
xxx
FIND ALL COCOWAWA QUILT PATTERNS
MORE LEARN TO QUILT POSTS