Tips for perfect curved piecing
Worried about achieving those perfect curves on the Dewdrop quilt or our newest pattern the Broken Circles quilt? Not to worry :) I've gathered some tips and tricks for you to perfect curved piecing (and cutting). Ready?
List of tools and tricks to achieve perfect curved piecing
• Use your 28mm rotary cutter, cutting mat and, if you have one, your ruler, to cut the four pieces that form the main block.


• First, fold both pieces in half and finger press to mark the centre. Pin from there to the right and again from the centre to the left. For more accurate pinning, you can use your knee or a tailor's ham.
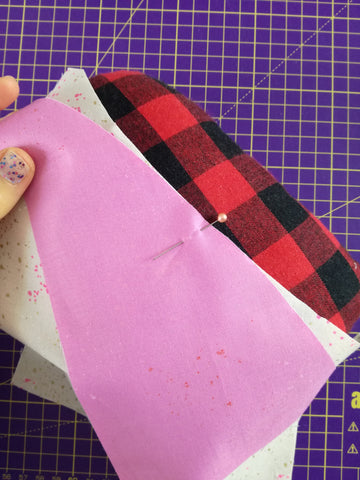

• Place pins at equal distances so the curved edges match. Use as many pins as needed.


• We recommend using a 1/4’’ foot to achieve better results and a more consistent seam allowance throughout.

• Stitch with a short (2.4-2.6) stitch length.
• You will find that the fabric wrinkles as you sew, mainly the one at the top. That is normal. Go slowly and make sure that the fabrics lay as smooth as possible under your needle all the way. If you need to stop, leave your needle down, raise your presser foot and adjust. Don’t worry about starting over or using your seam ripper if necessary. Continue checking that the edges of both pieces are aligned. Keep lifting the presser foot to reduce bulkiness before continuing.

• Remove pins as you sew. Avoid pulling or pushing the pieces to be sewn so as not to stretch the curved edges.

• When you finish, press the seam together towards the darker fabric (some quilters prefer to press them open. Go for the method that you feel works best with your fabrics or that you feel will achieve a better result). Don’t use steam, just the heat of your iron. You can also apply starch if necessary or water with a spray.

• Cut a practice block out of scraps before starting with your final fabric.
We hope you found this post useful and that you are ready to tackle the Dewdrop Quilt and the Broken Circles Quilt patterns. And if you want to share what you have made with us, remember to use the hashtags #cwdewdropquilt, #dewdropquilt, #cwbrokencirclesquilt and #cocowawaquilts on your posts on social media.
Happy quilting!
Ana
xxx