Piecing is the term used to describe the act of assembling and stitching pieces of fabric together, by hand or machine, to make a quilt block. If you are a beginner quilter, it is a good idea to learn a few tips and tricks to get the best results when piecing your first quilt :)
How to achieve the perfect quilt top
Main piecing techniques
The ones mentioned below are the most common ones. On this post, I will be focusing on the first technique, which is the one I have the most experience on. If you would like to know more about each one, head to this post.-
Machine piecing: units are sewn together using a sewing machine, then pressed and sewn again into larger blocks to create the quilt top.
-
Appliqué: needlework technique in which one or more pieces of fabric are attached to a larger background fabric to create pictures or patterns.
-
Paper piecing or foundation paper piecing: you use a paper template to outline which fabric goes where, then stitch (with your machine) both the paper and fabric together along dotted lines.
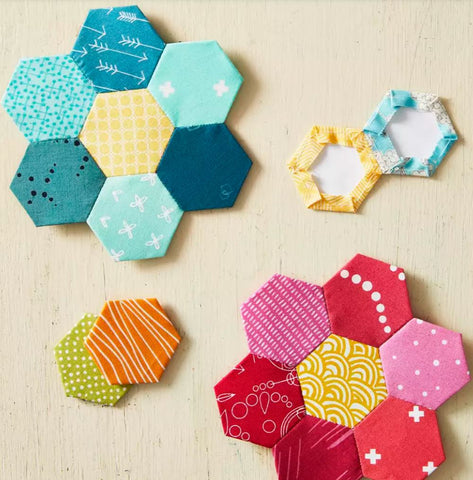
- English paper piecing: hand sewing technique where the fabric is wrapped around a paper template to make individual patches. The most popular shape is the hexagon.
All People Quilt
Machine piecing and pressing tips
The winning formula for a perfect quilt top is:
ACCURATE CUTTING + NEAT PIECING + GOOD PRESSING TECHNIQUE
For the piecing part, I have a list of tips and tricks that will help you on your quilting journey, no matter which design or pattern you use or make.- Needle: go for a universal size needle of 80/12. There are also specialized quilting needles if you fancy giving them a go. Change your needle every 4 to 8 hours of sewing.

-
Thread: The weight of a thread is a length measurement. Dividing the length of thread by a set weight derives the measurement of a thread weight. A thread is labeled 40 wt. when 40 kilometers of that thread weighs 1 kilogram. For piecing, I recommend 40-50 wt (weight).
- Piece your units using a 2.1 stitch length. Start with a little piece of fabric called ‘header’, so that when you reach the unit you are sewing, the tension on the needle is correct. To avoid going on top of bumps (for example, when several seams come together), create a ‘double header’ and place it behind the part that is bulky so that the presser foot and needle go over that part first.

- When creating HSTs (Half-Square Triangles), cut the top tip to make it easier when you start sewing.

- Use masking tape to achieve a straight line and the correct seam allowance, which usually is ¼’’ or a scant ¼’’ (just a bit smaller). There is also a specific presser foot to help you achieve it.

- When piecing curved seams on a quilt, fold pieces along the centre to match and place your first pin there. Also use lots of pins to secure. Remember to place the smaller piece on top to avoid puckers and folds. Go slowly and stop to adjust when necessary.


- Use a pin, tweezers or a special tool like the one below so that the end of a seam stays in place as it usually moves to the side when piecing two units together.

Clover
-
Try to never have a bias edge on the outside of a block to avoid it overstretching when pieced and pressed. I found this amazing tutorial a while ago in case you do have to sew bias edges together.
- Now, I wanted to fous on how to set / press a seam:
-
Don’t use steam on your iron to get rid of wrinkles on your fabric / units / blocks before sewing them together. Spray with water and press gently with a hot, dry iron.
When sewn, continue with no steam and don’t move the iron (as when ironing a garment) as it will distort the block. Tap gently and use starch spray if necessary when facing a bulky seam.

- Set the stitches first by pressing them flat together on the wrong side after sewing.
- Then, finger-press the seams together to the darker side or open, before using your iron. Avoid shadowing of darker fabrics on lighter fabric.
- When pressing curves:
- Decrease the stitch length.
- First, press the seams together towards the outer piece (the seam naturally faces that way), then open them and start pressing on one side, getting to the centre, then rotate and finish pressing. Give it another good press to the whole thing and on the right side of the fabric.
- Open seams in general create flatter tops which makes the quilting process easier. This is also useful for when lots of seams get together in the same place to avoid bulk.


- Last, the victory lap: sew all around your quilt top using a ¼’’ seam allowance to make sure seams don’t come undone on the edges when basting or quilting.
And that is it for today! I hope you found this new post interesting and useful on your quilting journey.
Keep following for more and leave a comment :)
Happy quilting!
Ana
xxx