Hi everyone!
Are you ready to keep working on your Honeycomb? On today's post we are going to sew our set-in sleeves and here you will see that I have made the short sleeve version. But! You can also make the long sleeve option with bows by following the Honeycomb Dress and Shirt tutorial on YouTube.
There is a regular long sleeve version (no bows, just a normal hem at the edge); the short sleeve alternative that you are going to see here and a sleeveless one finished with bias tape. We wrote a great tutorial for the Marshmallow Dress pattern a while ago on how to use bias binding and that you can apply here in the same way.
And now, for the steps.
Sleeves
Short sleeves
Pick up your sleeves and sew a line of gather stitches between the two markings on the pattern and within the seam allowance. Make sure you have chosen the short sleeve option.

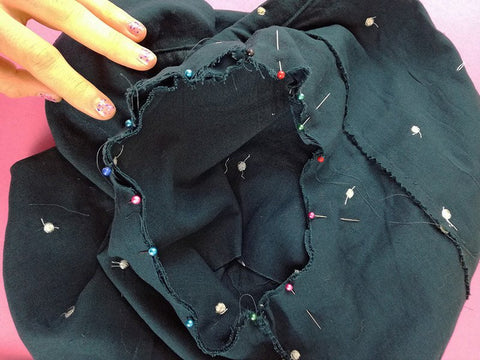
Now with right sides together and matching notches align both raw edges on the sleeve piece along the underarm seam. Pin and sew. Finish that seam with your preferred method.

Turn the sleeve right side out and with your bodice piece wrong side out place the sleeve right sides together along the armhole. Pin matching notches and, pulling slightly from the gather stitches, align both pieces and finish pinning. Sew and finish that seam.

Do the same with the other sleeve. Now just finish the hems by turning them wrong sides together by 1cm, press and again. Sew and turn everything right side out.


And our sleeves are done! Just as easy :) Remember that you can choose any of the other options and find useful help on YouTube and on the blog.
Tomorrow it is the last day of our Sew Along and we are going to finish the shirt / dress with a lovely peplum or skirt, depending on the option you are going for.
Happy sewing.
Ana
xxx