Learn to clone your favourite garments
Hi lovely makers! I am back with a tutorial on how to copy your clothes. I think it is something quite common among sewists to want to replicate your favourite ready-to-wear, high-street t-shirt or dress. It involves a bit of pattern drafting but nothing that you won't be able to do with practice.
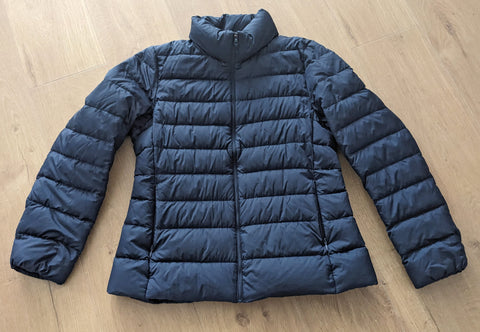
To use as an example, I am going to show you how I clone my favourite light-down Uniqlo jacket. It is a bit of a more advanced garment to copy, but the technique is the same in the end. If you go to the end of this post, you will also find a vlog I filmed for the CocoWawa YouTube channel a few years ago where I clone a dress :)
Shall we start?
Tutorial part I: Drafting
On this first post, I am going to focus on the drafting and copying of the garment itself, which means creating the pattern pieces. In the second post, I will share how I actually made the jacket. Now, let's talk about what you need to have at hand, apart from the actual piece of clothing you would like to replicate.
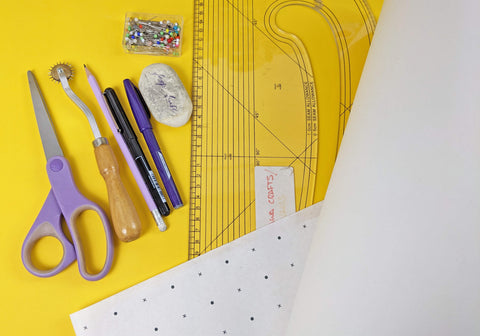
Drafting tools
- Pattern master: specialised drafting ruler; not mandatory but useful if you plan on doing more pattern making. A normal ruler would work as well.
- Pencil and eraser.
- Different coloured pens for marking.
- Drafting / sewing dot and cross paper or similar.
- Paper scissors.
- Masking or painters tape.
- Tracing wheel: not mandatory, but useful for copying. You can also use pins.
- Cutting mat and / or thin foam sheet layer (you can find these at many stationary and painting shops) to place underneath your sewing paper if using a tracing wheel to protect your table.
Steps to copy your favourite garment (based on the jacket I want to replicate)
1. Place your garment on a flat surface, pick up paper and a pen and write down all the parts of the garment you need to copy. You can also make a small drawing next to each one to visualise better how the pattern piece is going to look. You might also want to simplify a pattern piece or change a way a seam is finished. This is the best moment to make those decisions.
In my case, I need (with changes mentioned):
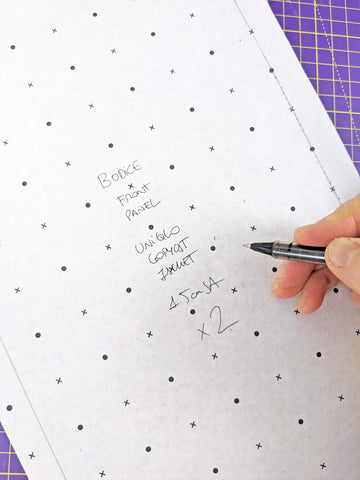
- Sleeve x 4 as each is made out of two pieces, the upper and the lower sleeve. (I might go for just the more common 1 sleeve piece, so I will only need 2).
- Front panel x 2.
- Side panel x 2.
- Back bodice x 1 on the fold.
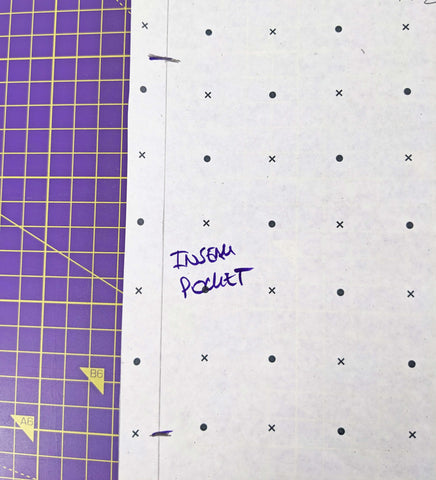
- Inseam pocket x 2 (along the seam between the front and side panels).
- Collar x 2.
- I am ignoring the two thin inner pockets the original jacket has, as I don’t have the material for them and don't use them.
- I am also ignoring the elastic at the bottom hem as I have never used it.
- I am adding the hanging loop for the collar part found in the original and the zipper puller.
- I might sew a simple string bag with quilting cotton to carry the jacket inside when travelling (the original Uniqlo jacket has something similar as well).
-
- Still deciding on which zippers to use. I have both invisible and regular ones. The original jacket features all invisible zippers.
- Last, I am making the jacket a bit bigger to have more room. The seam allowance will probably be 1.5cm.
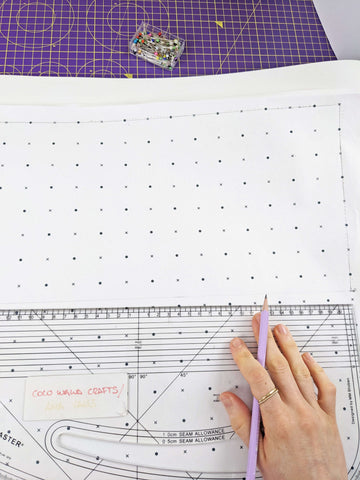
2. Place your cutting mat or foam layer (or both) on top of your sewing or cutting table or on any big-enough table you can use. Then, pick up the drafting paper and put it on top. After that, place the garment you want to copy as flat as possible, making sure it doesn't have any wrinkles.

3. Now, we are going to start tracing the different pattern pieces. I am going to start with the front panel, which is part of the front bodice. I am using pins to keep the jacket in place and to mark the parts from the bodice that I won't be able to draw with my tracing wheel.
As you can see below, I am using both the cutting mat and the foam layer to protect the table and to be able to hold the jacket in place.
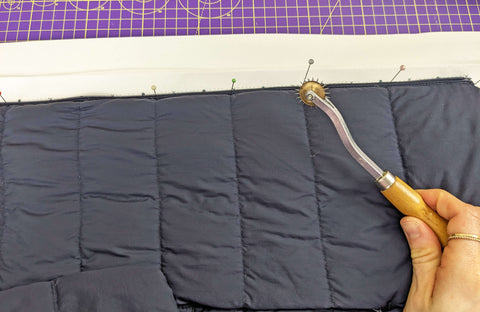
4. I am folding the jacket in a way that only the front bodice is in contact with the tracing paper + foam layer + cutting mat.
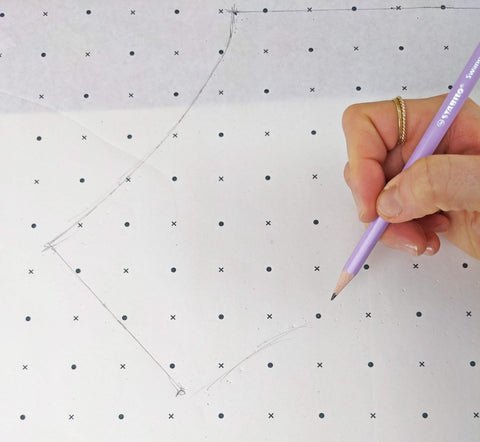
I am pinning it in place without damaging the material and making sure it lays very flat. Now, I pick up my tracing wheel and start marking the shilouette of the front panel bodice as best as I can along the front edge where the zipper goes (it will never be perfect this first time but you can correct it with your ruler later on).
5. For the seams attached to the collar, the shoulder, the armhole and the side seam, I need to use pins to help me mark the shapes. The pins go through the material, right where the seam lines are and onto the paper and foam layer, making tiny holes (be as gentle as possible at this stage with your pins).

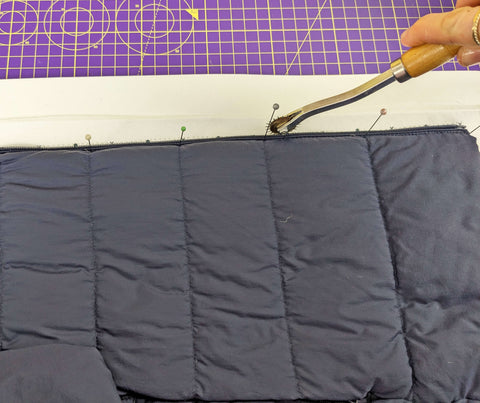
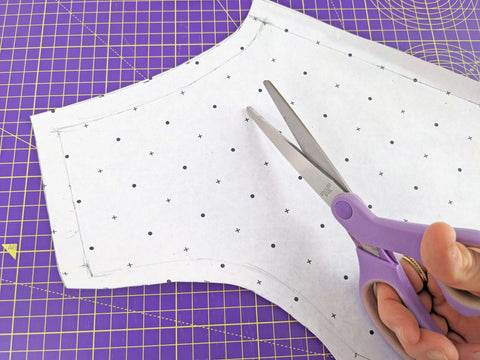
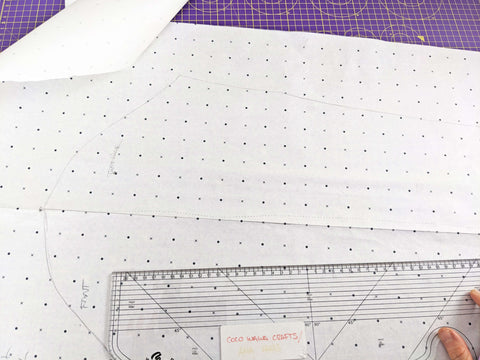
6. Now that I have marked my shape, I am going to unpin the jacket, pick up my pattern master (or ruler) a pencil and start joining the markes made with the tracing wheel and with my pins. At this point, you can really work on those lines to make them as perfect as possible.

This is also a good moment to pick up your measuring tape and compare all the measurements involved in that pattern piece with its real counterpart. In my case I am measuring the front of the bodice front panel, the side seam, the neckline and the armhole. For these two last ones (for curved seams), hold the tape measures up for a more accureate meassurement.
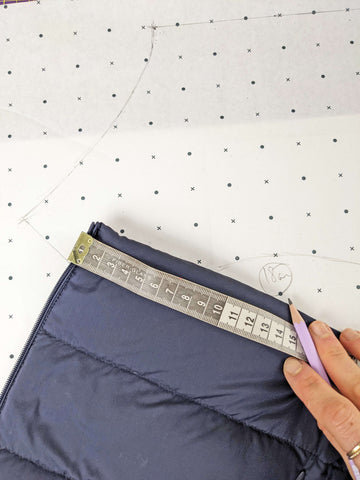
Write those down and compare them to what you have drafted. Adjust if necessary. Also, have in mind that your new copycat garment is not going to be 100% similar to the original, but your own handmade version :)
7. Now, you need to add the seam allowance. In my case, as I mentioned before, I am adding 1.5cm to all sides; although I will be sewing with a 1cm seam allowance, so that I have that extra room I wanted.
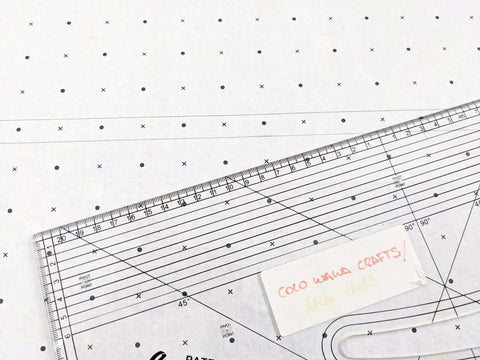
Using your different coloured pens, you can add the name of the pattern piece, size, seam allowance and mark any possible notches and annotations that you many need later on when cutting your fabric.
8. Next, replicate steps 4 to 7 for the rest of the pattern pieces in the exact same way. Regarding the sleeves, I always use a little trick. You first trace one side, marking half of the armhole with pins as we did before, then fold the paper, and mark the other side with your tracing wheel.


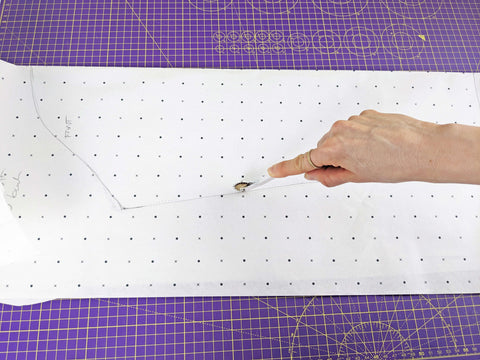
Then, with your ruler and pencil, finish drawing the whole shape of the sleeve. My original sleeves were made out of two pieces each with an upper and lower sleeve but I wanted to make it easier for myself so I simplified it (I also had to measure and change the crown of the sleeve as it didn't have the correct measurement. Fingers crossed it will work!).
*Note: Remember to add around 4cm for the hem of the garment and the bottom of the sleeves. I say 4 as I like folding a hem twice by 2cm, but you can add whichever amount you prefer.
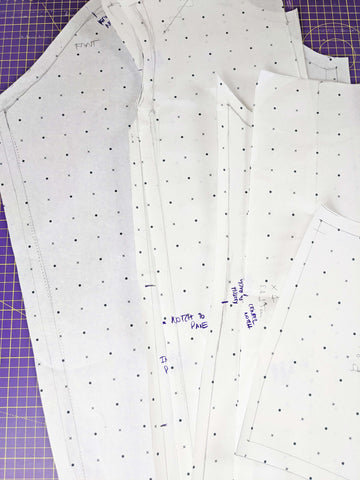
Take a look at all my already drafted pattern pieces. Now, I am ready to cut and sew my jacket!
Thanks for reading and happy sewing!
Ana
xxx
OTHER FUN TUTORIALS
HOW TO COPYCAT YOUR FAVOURITE DRESS