Make a quilted Christmas tree ornament with me!
Hi lovely stitchers,
I am back on the blog to share a super quick and easy tutorial on how to make your very own quilted Christmas tree ornament. It is a great scrap buster and a good project to practice quilting if you are a beginner.
Now, I will share which tools and materials you will need to make your very own quilted tree!

Recommended tools
You won't need much to make your tree and if you are a sewist or a quilter already, I am sure you already have many of these.
- Sewing machine.
- Fabric scissors and optional pinking or zigzag scissors.
- Rotary cutter and cutting mat.
- Quilting ruler.
- Matching thread or a thread you won't mind seeing on the outside.
- Other usual sewing and quilting tools like pins, trimming scissors, 1/4'' presser foot, walking foot (these last two are not mandatory but they help).
Materials needed
As this quilted Christmas tree is an amazing scrap buster, go and take a look at all those small pieces of fabric you kept from your other quilting projects (you can also use leftovers from finished dressmaking garments!).
For my tree I used:
- Scraps from a quilt I made last year. They are all quilting cotton. The strips have a 1 1/4'' width and the length will depend on the size of your tree, but in my case they were around 6'' long.
- For the wadding, I went again for leftover material from old projects.
- The backing was a bigger piece of the same fabric I used for the tree.
- Same for the little ribbon at the top.
Steps to make your own quilted festive tree
Now, let's get started!
1. Draw a simple tree shape as your template with your desired measurements or print a free tree shape that you can find online.
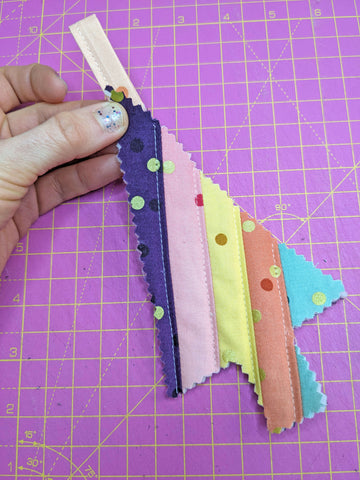
2. Cut several strips of fabric (use scraps if you can. Mine are quilted cotton) with a width of 1 1/4" each. I cut 5 for my tree.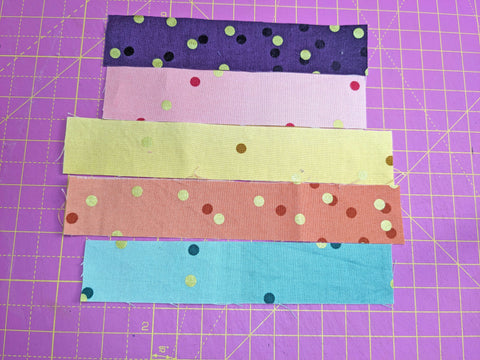
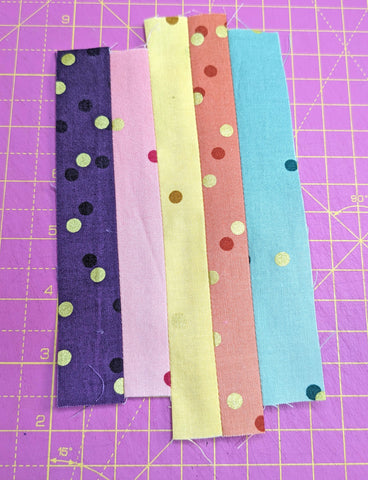
3. Sew them together using a 1/4" seam allowance. Press seams open or towards the darker colour.
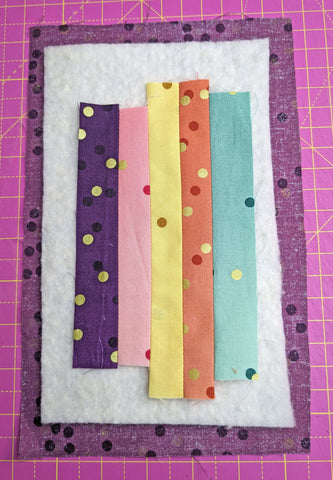
4. Check that your tree fits comfortably within the fabric panel. I turned my tree to get diagonal strips. Then, place the back of your tree with the right side to the table, then the wadding or batting on top and then the front fabric.
Make sure that the wadding and backing are a bit bigger than the top panel of your tree. You can place a couple of pins to secure the three layers together.
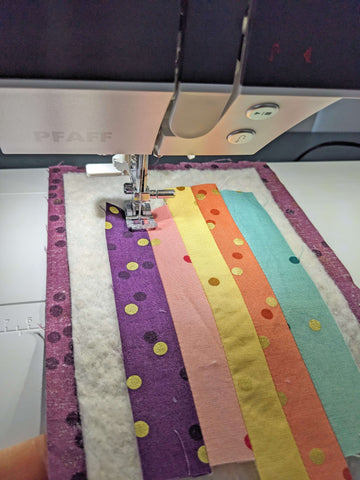
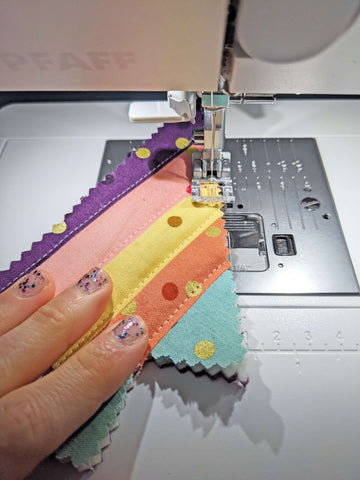
5. Quilt following the seam lines. I stitched just a couple of mm from them.
6. Place your template on top, pin and cut around. I used pinking or zigzag scissors.


7. Use a bit of ribbon to hang the tree or create it with some fabric like I did. Pin it to the top.
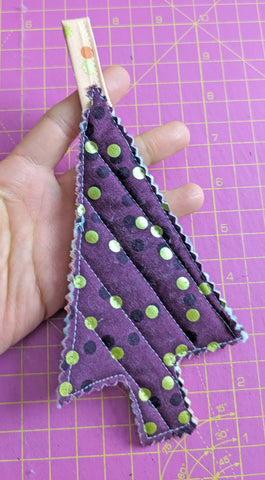
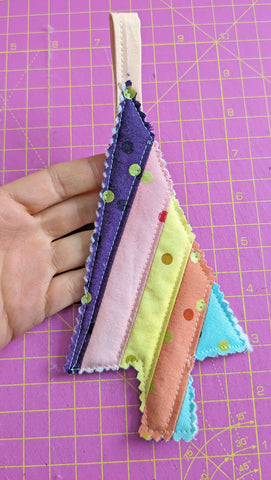
8. Stitch all around your tree to secure the edges and the ribbon bit and... you are done! 🥳
I hope you enjoyed this super quick and fun tutorial and that you will make a few of these cute trees for yourself or to give as a cute Christmas present.
Leave a comment if you have any questions or to share your thoughts on the project!
Happy sewing and quilting,
Ana
xxx