Follow our free quilt tutorial
Hi lovely makers!
I am back again with a super fun and colorful tutorial on how to make your very own quilted placemat and! extra cute coasters to go with it :) This project is perfect for beginner quilters and sewists wanting to learn how to quilt.
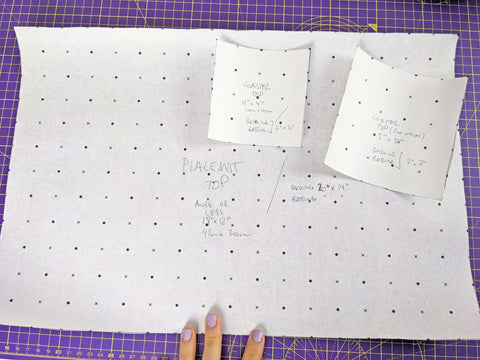
I used pattern drafting paper to create the templates when I started working on the tutorial. This is not mandatory, but it was useful for me to test how the scraps would look like having the dimensions in mind. At first, I drafted two different coaster sizes but realised than one was too big. The final placemat measures 12''x18'' and the coaster is 4''x4''.
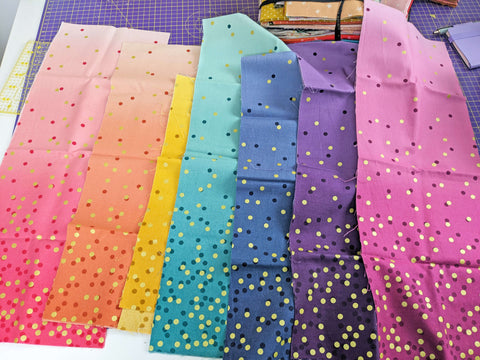
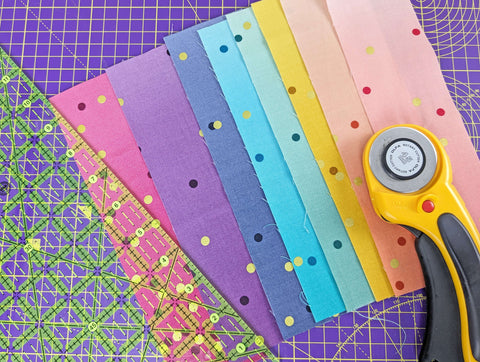
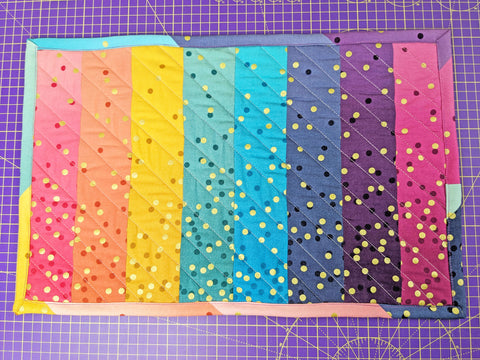
When checking my scraps, I ended up choosing this super colorful fabric I had leftover from a quilt I made last year. They are from the Ombre Galaxy Metallic collection by V and Co and I have been wanting to use them for quite some time.
Now, let's talk about fabrics and tools.
Materials needed for the placemat
- 1/2 fat quarter in 8 different colours of quilting cotton, if you want to make my rainbow version. If not, you can totally use your own scraps and make your placemant using your own calculations and prefered measurements.
- A piece of batting measuring 13 1/2''x20''.
- Another piece of quilting cotton for the backing, measuring as well 13 1/2''x20''.
- Thread for piecing (sewing the rectangles together) and thread for the quilting part. I always recommend a colour that can easily blend in to hide any mistakes. You can use regular polyester thread.
Essential tools and nice to have
Necessary:
- Sewing machine.
- Rotary cutter and cutting mat.
- Fabric marker.
- Quilting ruler: maybe not essential, but so useful!
- Usual sewing tools: fabric scissors, trimming scissors, pins, iron and ironing board...
Nice to have:
- 1/4'' presser foot: great for getting a perfect seam allowance.
- Walking foot: very useful for the quilting part.
- Wonder clips: nice to have when pinning several layers together.
If you have all your materials ready, we can now start!
Step-by-step placemat tutorial
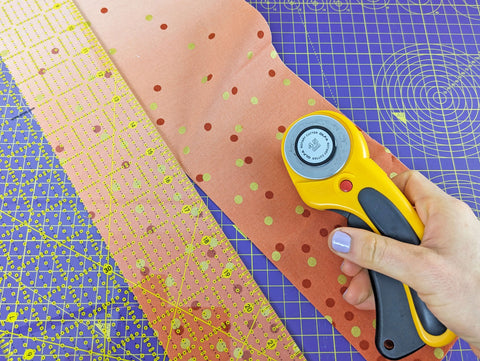
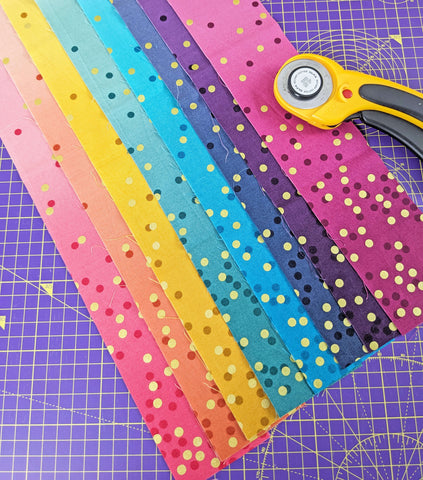
1. Cut 8 strips, one for each colour of the rainbow version and measuring 2 3/4’’x14''. We are cutting them a bit bigger than what the top of the placemat is supposed to be in case we make a mistake. We will trim the top when sewn later on.
Use your rotary cutter, cutting mat and ruler to get the best results.

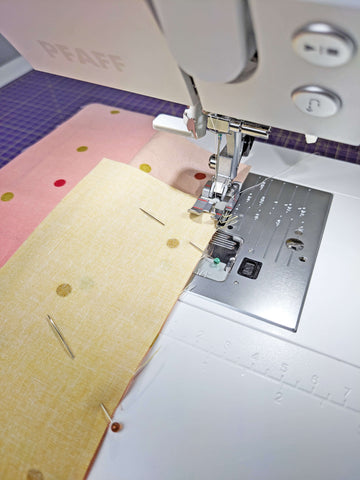
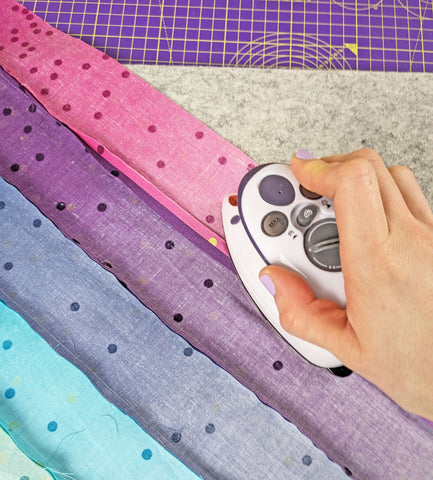
2. Pick up two of the strips, place them with right sides together, pin them and sew using a 1/4'' seam allowance along one of the long edges. Press seam open or to the darker colour (I usuall prefer open to distribute the weight of the seam evenly).
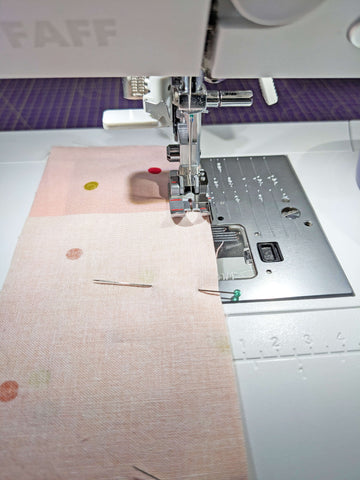
Keep adding strips and pressing seams.

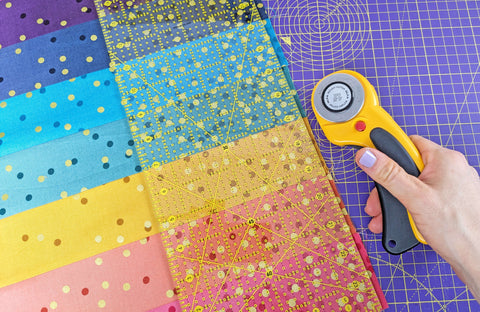
3. Square-up the top part of your placemat by making sure that the corners are at a 90 degree angle and that it measures, more or less, 12''x18''. Use your rotary cutter, cutting mat and quilt ruler for accuracy.
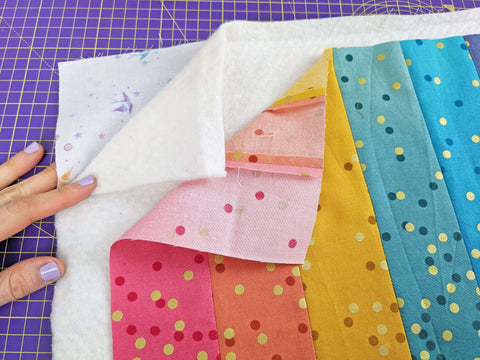
4. Pick up your batting and your backing (the back of your placemat). Both should be one inch or 1 ½’’ bigger on each side than the top layer of your placemat. Place the backing with the right side facing down on your table, then the batting and then, with the right side facing up, the top layer you have just finished.
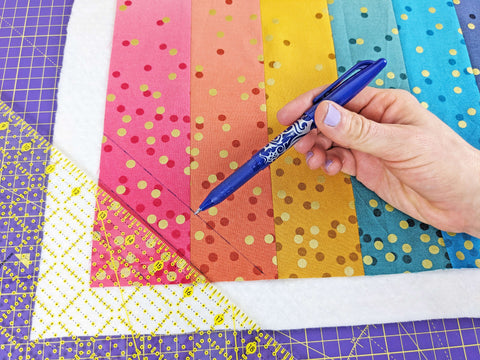
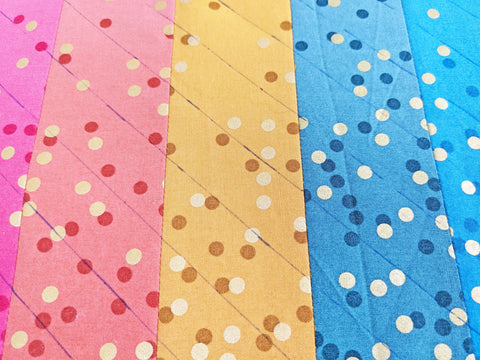
5. Before securing the three layers together, we are going to mark the desired quilt design that you want to do on top of your placemat. If it's your first time quilting, go for something simple that won't take you much time.
In my case, I opted for 1'' wide diagonal lines, starting at the bottom left corner and easily marked using my quilt ruler and Frixion Pen. Frixion is just a regular Pilot pen, but what makes it different is that it goes away when applying heat to it. Even though it has always worked for me, it is recommended testing it on a scrap of the same material that you are going to use.
You can also doodle a bit on a piece of paper to make sure you are happy with the quilt design you want to go for.
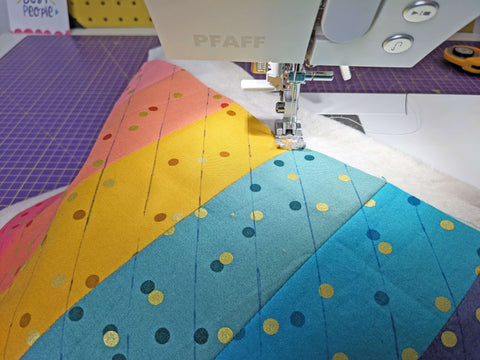
6. Now, you are ready to quilt your placemat. Use a walking foot if you have one (my Pfaff machine has a built-in walking foot IDT system that stands for Integrated Dual Transportation) and increase the length stitch to 3mm. Also, check the pressure of your presser foot and the tension of the thread. Do a test to make sure you are happy with how your stitches look and check the colour of the thread that you are using for this part as it will show.
It is also important to take your time; walk, don't run! And always start and finish sewing on the batting layer. There's no need for reverse stitching.
7. When you finish quilting, trim the excess batting and backing using your rotary cutter, cutting matand ruler.

Now! Take a little break, have a snack, hydrate and stretch. You are almost there! :)
How to make your own bias binding
8. The last step on this tutorial will be to create your own bias binding. The total length should be the same as the perimeter of your quilted placemat plus 6''.
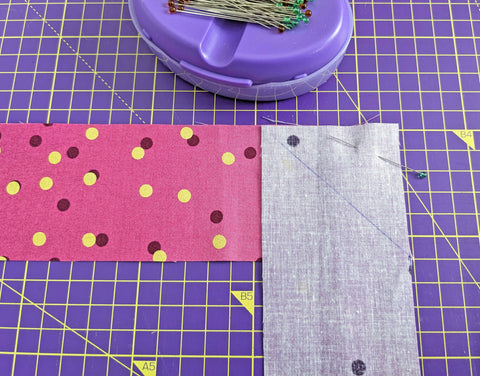
Pick up any leftover fabric you want to use (I opted for the same colours as the ones I used on the top layer) and cut strips with a 2 1/2'' width. In my case, I cut 10 strips with a length of 9-10'' each. I always recommend using this amazing online calculator to know how many strips you need and the length of each one of them. Your own measurements will depend on how many different fabrics you want to use.
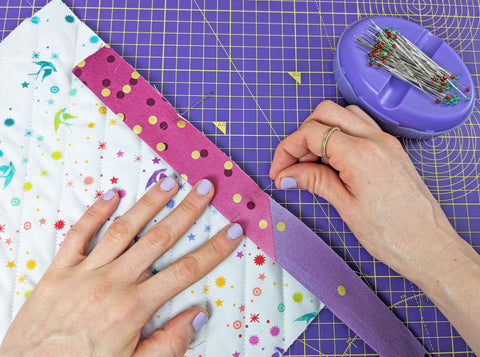
9. To create your bias binding, start by picking up two of the strips. Place them at a 45 degree angle as shown below and with right sides together. Mark a line using a fabric pen or piece of chalk from one corner to the other. Pin.
10. Sew right on top of the line you have just marked using your normal sewing machine settings and universal presser foot.
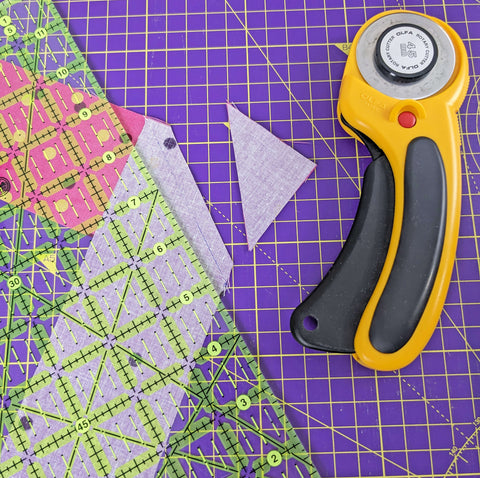
Then, cut the extra fabric to the right of the line of stitches and leaving a 1/4'' seam allowance. Press that seam open.
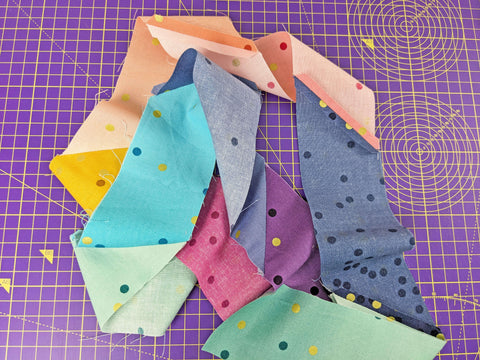
Keep adding strips until you reach the necessary length and pressing the seams open. Then press again the whole finished bias tape with wrong sides together along the centre.
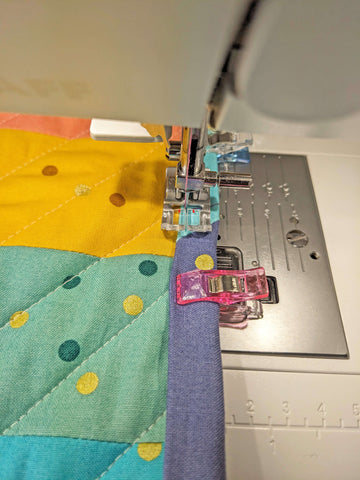
11. Pick up your bias binding and start pinning it with right sides together to the back side of your placemat. I always start in the centre of the right edge. The raw edges of your placemat should align with the raw edges of your folded bias tape. Stop pinning at the first corner.
Go to the machine and sew this part of the bias tape in place using a 1/4'' seam allowance. Start sewing after the 3-4'' of tail that we have left unpinned at the beginning and stop at 1/4'' from the bottom corner. Reverse stitch and take the placemat out of the machine.
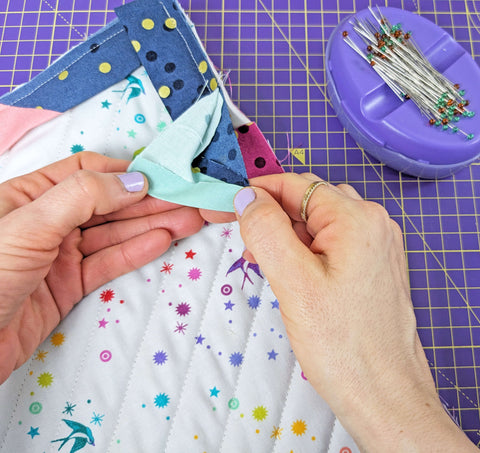
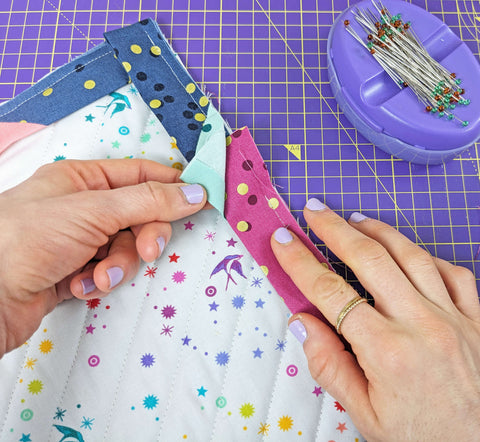
12. To achieve a nice mitered corner, you need to first fold the bias back on itself creating a 45 degree fold as shown below. Finger press.
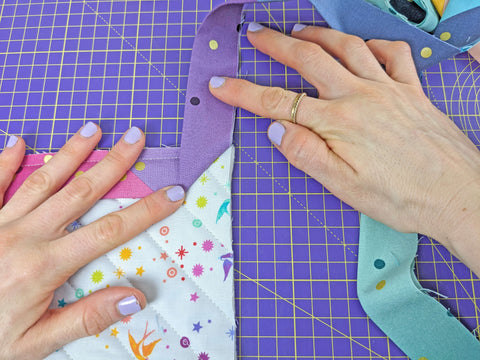
Then, fold it again towards itself as shown below, covering thef first fold.
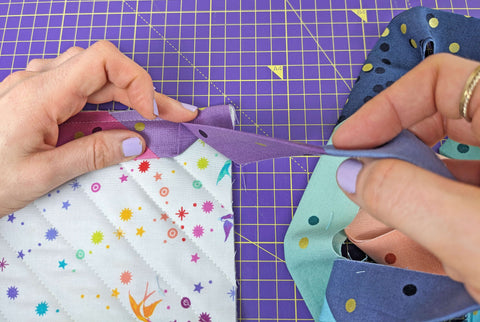
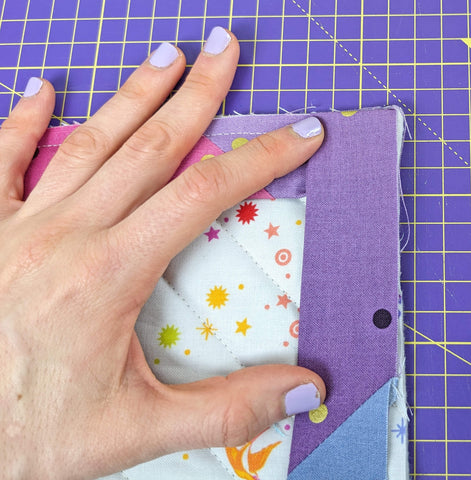
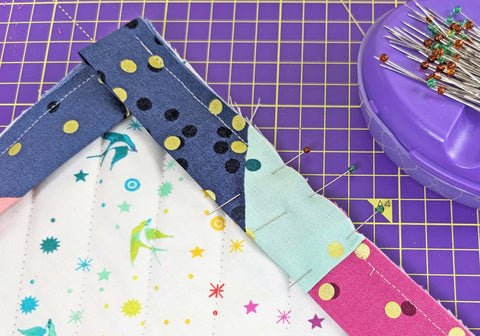
Pin that side of the placemat in the same way that you did with the right edge and sew in place till you stop at the next corner, leaving again a 1/4'' space at the bottom. When you sew this first mitered corner, you need to start at 1/4'' from the top.
13. When you are done with all the corners, you need to join together the two ends of the bias tape and sew them to the edge of the placemat. For this, we are going to use a beginner-closure style. Fold one of the ends of the tape by 1/2'' towards the wrong side and press with your fingers. Then, insert the other end, sandwiching it inside of the tape. Pin it to the placemat's raw edge and sew.
You might need to trim the ends if they are too long before this step.
14. Now, press the bias tape towards the outer of the placemat, so that it is easier to fold and sew the bias binding to the right side. Make sure that your corners are nice and on point and use, if you have them, clips to make the bias tape stay in place. This way, we are covering the raw edge and sewing with the maching the other side of the bias binding in place.

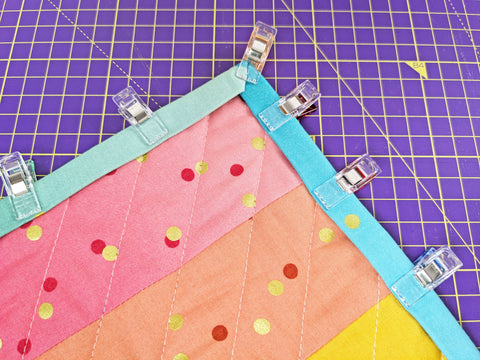
When sewing the tape, edge-stitch, just a couple of mm away from the inner fold all around. Pivot at the corners, making sure that you catch both sides.
And now... you are done! Congratulations! Give your very own handmade quilted placemat a nice press and enjoy using it! Pssst. This is a great gift as well ;)
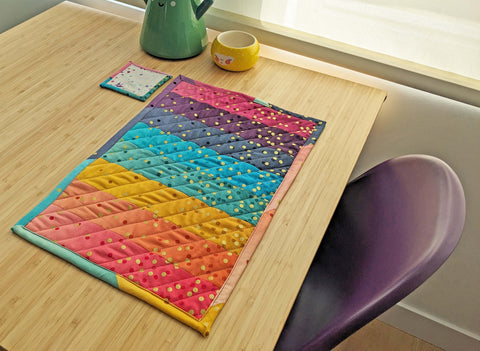
You can also make your own handmade quilted coasters following the exact same steps, but changing the dimensions. I made mine (picture above) using a 4''x4'' square template :)
I hope you've enjoyed this tutorial, thank you so much for reading, leave me a comment or question if you want to and see you again soon.
Happy sewing and quilting!
Ana
xxx